什么是 Graylog Sidecar?
Graylog Sidecar 是一个灵活的配置管理框架,适用于各种称为后端的日志收集器。 Graylog 主节点充当位于中心的枢纽,其中包含日志收集器的配置。 Sidecar 可以在 Windows 和 Linux 服务器上作为服务运行。
随着 Web 应用程序变得更加分布式,需要了解的最重要的事情之一是您的系统的行为方式。 因此,我们将指导您如何安装用作日志收集器的 Graylog Sidecar。
先决条件
为了运行 Sidecar,在启动任何 Graylog 服务之前,我们需要安装和配置以下软件。
- 爪哇 >= 8
- Elasticsearch 5.x 或 6.x
- MongoDB 3.6 或 4.0
- 获取
CentOS 7 安装 Sidecar
满足以上条件后,我们需要下载我们要使用的Sidecar版本的RPM包。 最直接的方法是从 Graylog 下载一个预编译好的 rpm 包 存储库.
下载 RPM 包后,我们需要安装它。 我们可以使用“yum localinstall”命令安装 Graylog 来安装软件包。
[[email protected] ~]# wget https://github.com/Graylog2/collector-sidecar/releases/download/1.0.2/graylog-sidecar-1.0.2-1.x86_64.rpm --2020-03-11 14:57:51-- https://github.com/Graylog2/collector-sidecar/releases/download/1.0.2/graylog-sidecar-1.0.2-1.x86_64.rpm Resolving github.com (github.com)... 140.82.114.4 Connecting to github.com (github.com)|140.82.114.4|:443... connected. HTTP request sent, awaiting response... 302 Found Location: https://github-production-release-asset-2e65be.s3.amazonaws.com/46565708/327c3c80-c020-11e9-9ca8-3c584ca1e5e7 [following] --2020-03-11 14:57:52-- https://github-production-release-asset-2e65be.s3.amazonaws.com/46565708/327c3c80-c020-11e9-9ca8-3c584ca1e5e7 Resolving github-production-release-asset-2e65be.s3.amazonaws.com (github-production-release-asset-2e65be.s3.amazonaws.com)... 52.216.225.136 Connecting to github-production-release-asset-2e65be.s3.amazonaws.com (github-production-release-asset-2e65be.s3.amazonaws.com)|52.216.225.136|:443... connected. HTTP request sent, awaiting response... 200 OK Length: 2941991 (2.8M) [application/octet-stream] Saving to: ‘graylog-sidecar-1.0.2-1.x86_64.rpm.1’ 100%[===============================================================>] 2,941,991 15.6MB/s in 0.2s 2020-03-11 14:57:52 (15.6 MB/s) - ‘graylog-sidecar-1.0.2-1.x86_64.rpm.1’ saved [2941991/2941991] [[email protected] ~]# 安装 Graylog Sidecar
下载 RPM 包后,我们需要安装它。 我们可以使用“yum localinstall”命令安装软件包。 我们使用 yum localinstall 命令而不是 rpm -i 命令,因为 yum 将确保安装所有必需的依赖项。
[[email protected] ~]# yum localinstall graylog-sidecar-1.0.2-1.x86_64.rpm Loaded plugins: fastestmirror, priorities Examining graylog-sidecar-1.0.2-1.x86_64.rpm: graylog-sidecar-1.0.2-1.x86_64 Marking graylog-sidecar-1.0.2-1.x86_64.rpm to be installed Resolving Dependencies --> Running transaction check ---> Package graylog-sidecar.x86_64 0:1.0.2-1 will be installed --> Finished Dependency Resolution Dependencies Resolved ====================================================================== Package Arch Version Repository Size ====================================================================== Installing: graylog-sidecar x86_64 1.0.2-1 /graylog-sidecar-1.0.2-1.x86_64 7.3 M Transaction Summary ====================================================================== Install 1 Package Total size: 7.3 M Installed size: 7.3 M Is this ok [y/d/N]: y Downloading packages: Running transaction check Running transaction test Transaction test succeeded Running transaction Warning: RPMDB altered outside of yum. Installing : graylog-sidecar-1.0.2-1.x86_64 1/1 Verifying : graylog-sidecar-1.0.2-1.x86_64 1/1 Installed: graylog-sidecar.x86_64 0:1.0.2-1 Complete! [[email protected] ~]# Graylog Sidecar 配置
在激活 Sidecar 之前,我们需要编辑 Sidecar 配置文件。 文件的默认位置是 /etc/graylog/sidecar/sidecar.yml。 我们可以使用 vim 编辑这个文件。
[[email protected] ~]# vim /etc/graylog/sidecar/sidecar.yml编辑 Sidecar 配置文件时,大部分设置可以保留为默认值。 唯一需要调整的选项是 服务器网址 环境。 此选项允许我们使用 Graylog API 和 server_api_token,这让我们可以对 Graylog API 服务器进行身份验证。 设置应配置如下。
- 服务器网址:Graylog API 的 URL,例如 https://192.168.1.1:9000/api/
- server_api_token:用于对 Graylog 服务器 API 进行身份验证的 API 令牌。
例如 1jq26cssvc6rj4qac4bt9oeeh0p4vt5u5kal9jocl1g9mdi4og3n
令牌是强制性的,需要配置。
注意:server_api_token 需要使用 Graylog API 生成。 你可以在官方找到链接 Graylog 文档.
服务激活
编辑 Sidecar 配置后,我们需要激活服务。 由于我们使用的是 CentOS 7,因此可以使用以下命令。
[[email protected] ~]# graylog-sidecar -service install [[email protected] ~]# systemctl start graylog-sidecar打开防火墙端口
我们还必须在防火墙中打开端口 9000 才能查看界面。 我们可以使用以下命令完成此操作。
netstat -na | grep 9000 iptables-save | grep 9000 echo "filebeat 9000/tcp #sidecare" sudo tee -a /etc/services firewall-cmd --zone=public --add-port=9000/tcp --permanent firewall-cmd --reloadCentOS 7 上的收集器安装
安装 Sidecar 后,我们需要决定要使用哪个收集器。 Graylog 包含 Filebeat 和 NXlog 的默认 Linux 配置。 在本教程中,我们将使用 Filebeat 安装和配置,因为它是最常用的软件标题之一。
在 Linux (CentOS 7) 上安装 Filebeat
由于我们使用 CentOS 7 作为我们的操作系统,因此安装 Filebeat 最简单的方法是使用 YUM,但是,在安装之前,我们需要确保我们已经添加了 Beats 存储库。 让我们使用以下命令下载并安装公共签名密钥。
[[email protected] /]# rpm --import https://packages.elastic.co/GPG-KEY-elasticsearch接下来,要添加正确的存储库,我们需要创建一个 .repo 文件。 在 CentOS 中,您可以在以下位置找到您的 .repo 文件 /etc/yum.repos.d/ 目录。
使用以下命令,运行此命令以将以下行添加到我们的 elastic.repo 文件中。
[[email protected] ~]# echo "[elastic-7.x] > name=Elastic repository for 7.x packages > baseurl=https://artifacts.elastic.co/packages/7.x/yum > gpgcheck=1 > gpgkey=https://artifacts.elastic.co/GPG-KEY-elasticsearch > enabled=1 > autorefresh=1 > type=rpm-md" | sudo tee -a /etc/yum.repos.d/elastic.repo [elastic-7.x] name=Elastic repository for 7.x packages baseurl=https://artifacts.elastic.co/packages/7.x/yum gpgcheck=1 gpgkey=https://artifacts.elastic.co/GPG-KEY-elasticsearch enabled=1 autorefresh=1 type=rpm-md [[email protected] ~]# Filebeat Yum 安装
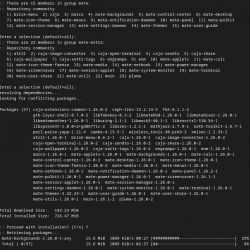
将正确的 repo 添加到我们的系统后,我们可以通过运行以下命令开始安装。
[[email protected] /]# yum install filebeat配置 Filebeat 服务
我们可以使用以下命令启动服务。
[[email protected] /]# systemctl start filebeat现在,我们可以使用以下命令将服务配置为在启动时自动启动。
[[email protected] /]# systemctl enable filebeat结论
无论您是想为您的服务器还是整个服务器集群添加额外的日志记录,Sidecar 都能满足这些需求。
如果您对 sidecar 可以运行的平台有任何想法或问题,请致电 800.580.4985,或打开一个 聊天 或与我们联系,与我们知识渊博的解决方案或经验丰富的托管顾问之一交谈,以了解您今天如何利用这些方法!